She is precious and deserves a cute little bedroom filled with crafts.
Don't you agree??
To start this project, you will need to go to your local home depot and have them cut a piece of 1/8 inch plywood. I have inserted a link to the type of plywood you may want to use. You would also have the option to use quarter inch plywood. This is a personal preference depending on how heavy you would like your picture. I personally had my picture cut to 2ft by 4 ft ( I know this is a large picture, but this is the main piece of art in Millie's room).
Next, you should head to your local Walmart and select the Waverly Ivory color (or color of preference) craft size chalk paint. This is located in the crafting section of Walmart. I painted the precut wood with this chalk paint. When painting, I used a VERY light stroke allowing the wood look to show through in many places.
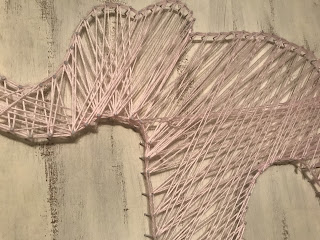
The next step to this project will be a little more challenging if you are not the "crafty" sort (Don't worry I have a great idea for you also). After the paint had plenty of time to dry, I took a pencil and freehanded the shape of an elephant in the center of the wood. Now, if you are not able to freehand draw, you can print an outline of an elephant or any animal of choice and then proceed to trace the printed image.
Onward, you will need to purchase (or go on a scavenger hunt in your house) VERY small nails. Here is a link to what I believe is the correct size.
Now, I am NO carpenter and I did find the nails I used in my husbands collection of tools and things. So, I believe this is about the size of nail used. Feel free to purchase shorter or longer nails. The point of the nails in this case, is to be strong enough to hold the yarn when pulled tightly. The nails need to stay in place when being pushed and pulled in all directions.
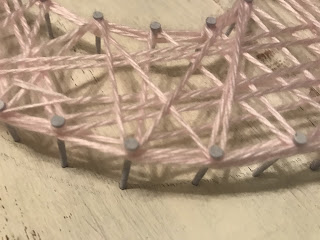
Next, you will need to hammer (very easily) into the wood piece along the outline of the shape you have created on your piece of wood. Between each nail, you should leave about half an inch. That means if you have a large design, you will need a LARGE amount of nails. When working on the nails, you should make sure the nails do not go all the way through your piece of wood. It is also important to feel each nail and make sure it feels tight and sturdy. If you touch the nail, it should not move. This step is a bit tedious, but worth it in the long run!
Onto the fun part of the craft! For this next part, you will need a roll of yarn. You can make your own choice of style and color for this part. As far as I know, the yard will work regardless of the type. I chose pink as my color of choice when designing Millie's art. To begin the yarn, you will need to find a good starting place among the nails. When you decide on a starting point, tie the yarn securely to about two or three nails. This is a little tough because the finished project looks best if you do not cut the yarn until the entire image is covered. This part of the project may take 3 or 4 times to complete. I started over a few times during this step (a little aggravating). To finish this step up, you will need to tie the yarn as securely as possible to the closest nail.
The last step to make this cute little project is to add decorations. I bought a couple of artificial flowers from Walmart and used the hot glue gun to add them to the corners. I also used a paint marker (hot pink) to add Millie's name in the corner.
Hope you all enjoy this project!


No comments